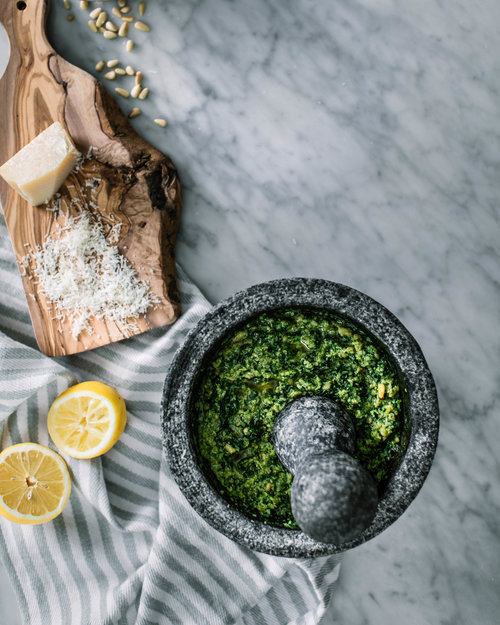
Even through the dead of winter, we do everything we can to hang onto our herbs. I don’t often cook with dried herbs and spices anymore, as I’m partial to the fresh stuff. However, come January and February, fresh local ingredients are scarce. So, having a basil plant on-hand for things like pesto is key.

The most significant piece of this recipe is how it’s made. I’m not a huge fan of the food processor, partly because of the cleanup… but mostly, I just don’t like the way it breaks down all the fibres of my herbs, and gives me very little control over my desired consistency and taste.
In general, I usually leave herbs whole or, at most, rip them roughly by hand. Mincing fresh herbs often leaves an enormous amount of their flavour in your cutting board and, without the fibres intact, you lose the punch of flavour they could potentially lend to your dish. So when pesto becomes borderline “smoothy” consistency, I find it pretty lacklustre in texture and taste. Furthermore, I don’t ever use a recipe for pesto, which made putting this together a bit tricky. The truth is, I’m tasting it constantly as I go, making small and frequent adjustments of oil, lemon, and salt. If I pulsed a food-processor as often and I spoon-mix my ingredients, there would be nothing left of my pine nuts or basil.
Using a mortar and pestle is a great wait to keep some fibres of the basil intact, while also having control over your preferred consistency. In the end, whether you like your pesto ultra-smooth or fairly chunky with the odd pine nut still intact, the choice is yours. And if you choose to go smooth, the flavours will probably still blow your socks off!
All that said, if you don’t have a mortar and pestle handy, you can still use this recipe in your food processor, pulsing carefully and doing your best to control your consistency. Additionally, if you only have access to a small mortar and pestle, you can always muddle your ingredients in batches and combine them in a separate bowl.
Mortar & Pestle Pesto
Ingredients
- 3/4 Cup Pine Nuts
- 2 Cups Fresh Basil, heaping cups
- 2-3 Garlic Cloves, peeled (minced if using a food processor)
- 3/4 Cup Extra Virgin Olive Oil
- 1/2-1 Lemon, juiced
- 1/2 Cup Freshly Grated Parmigiano Reggiano
- Coarse Sea Salt and Pepper
Instructions
- If using a small mortar and pestle, muddle ingredients in batches and combine in a separate bowl. If using a food-processor, carefully use the pulse function to get as close to desired consistency as possible.
- Set a pan over medium heat, and add pine nuts in an evenly spread layer. Toast for a few minutes, watching carefully, as pine nuts can burn quickly. Once the pine nuts are very light golden brown, transfer to a plate and set aside.
- In a large heavy mortar, place the garlic cloves, a small pinch of sea salt (to help grind down the ingredients), and the basil. Using the pestle, muddle the ingredients by crushing and grinding them into the surface. Depending on how rough the surface is, the basil may respond minimally to grinding, but it will deteriorate as you pound straight into it.
- Once the basil is fairly broken up, but still with small amounts of its fibres in tact, use a scraper to remove mixture from the sides of the mortar and guide it back into the centre. Add the pine nuts to the mortar, and continue to lightly pound until you have achieved your desired consistency. It’s okay to leave the odd pine nut whole, if you like a highly textured pesto!
- Scrape the mixture back to the centre of the bowl and incorporate whatever is left on the pestle. Set the pestle aside, and continue the rest of the recipe with a spoon, using the pestle only if you decide you want the mixture to be creamier.
- Juice 1/2 of a lemon and add it to the mortar, followed by 1/2 a cup of the olive oil. Mix well and add the parmesan.
- At this point, you need to make some decisions. If you plan to use your pesto for sandwiches, you might decide to leave it thick, only adding some salt, pepper, and maybe a little extra parmesan to taste. If you plan to toss over pasta, you’ll probably want to add the final 1/4 cup of olive oil, and/or some extra lemon juice. When finishing your pesto to taste, you want to consider the intensity needed for your serving style. For example, a less salty and intense pesto might be nice for an open-faced sandwich, while a decently large batch of pasta might need a bit more flavour to be able to balance all of the noodles. Depending on your taste and consistency preferences, finish it off to your liking.
- Mix well before serving over fresh pasta, chicken, or sandwiches. Pesto can be stored in the refrigerator for up to 7 days.
Leave a Reply